

How To Create A Meeting Room In Adobe Connect
- Message on the COVID-19 situation
Message on the COVID-19 situation
In recent weeks, performance has been somewhat unstable in Adobe Connect. We sincerely hope that it will return to normal in the near future, but in the meantime we would like to share some recommendations on how to adapt to the challenges that have been posed during this time.
Read more by clicking below.
- Finding your meeting rooms
Finding your meeting rooms
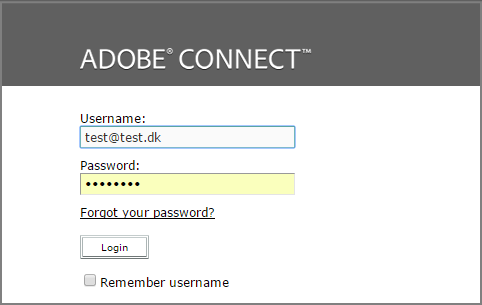
- Log in to Adobe Connect using this link: fabo.adobeconnect.com.
- Use the username and password provided to your unit/workplace.
- Enter.
- You are now in the home page of Adobe Connect.
- From here, you can find the rooms accredited to your profile or create a new room.
- CREATING A MEETING ROOM
CREATING A MEETING ROOM
To enter a meeting room:
Click or enter the URL for the desired meeting room in the Adobe Connect app. Type your Adobe Connect login and password, and then click 'Enter Room'. You can also enter a meeting room accredited to your profile, through Adobe Connect's online home page.
To create a new meeting room:- From the home page in Adobe Connect online, click on 'Meeting' and then "New Meeting".
- Fill in the information needed in the following form.
- Give the meeting room a unique name, and a meaningful URL (the first part of the URL is predefined, but you can choose the last bit).
- Consider how you will give access to your meeting room. For most purposes the default setting is the preferred setting, so if you are unsure, just choose that. The setting can always be changed later.
- ALWAYS keep the default settings regarding 'Audio Conference', namely "Do not include any audio conference with this meeting".
- Click 'Finish'.
Please note: Meeting rooms are always based on a template, which means they are created with a set of predefined layouts. You can always customise or delete these layouts, or insert new ones.
- From the home page in Adobe Connect online, click on 'Meeting' and then "New Meeting".
- Invite Participants
Invite Participants
As a host, you have two options on how to invite participants to your webinar. Learn how in the video below.
When you compose an email to invite participants, we propose that you include the following information:
- Information on what the webinar regards.
- The link to the meeting room.
- Date and time slot (including time zone).
- A link to Adobe Connect: Guide for Participants.
- Connect Microphones
Connect Microphones
Watch this short video tutorial to learn how to connect your own audio.
Once you are set up with your own audio, this video teaches you how to grant speaking rights to your participants.
NB: If there is not a check mark to the left of 'Microphone Rights For Participants', only the hosts will be able to speak.
- Troubleshooting Audio
Troubleshooting Audio
Microphone doesn't work
First, when entering Adobe Connect, make sure to connect your microphone beforehand.
Next, consider the following options:
- Did you do the Audio Setup Wizard?
- Is the microphone muted manually?
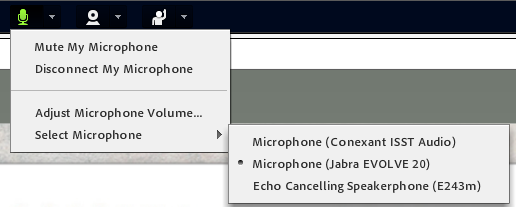
- Has the right microphone been chosen from the microphone drop-down menu? Check the below picture to see where you find it.
If all else fails, the quickest fix is to log out and come back in (keeping the headset plugged in).
If the participant continuously has issues with Adobe Connect you can guide them to the trouble shooting page, which you will find here.
- Preparing your meeting
Preparing your meeting
This video explains how the meeting room works overall, as well as how you manage different layouts .
- During the meeting
During the meeting
Recording

You can record all audio and visual elements of a meeting.
- When in the meeting room, go to the "Meeting" menu.
- Click on "Record Meeting".
- Give the recording a name.
- There you go!
NB: You can pause your recording during the webinar, by clicking the recording icon in the top right corner and then clicking 'Pause'/'Resume'.
Find and share your recording:
- Log in to the main page on fabo.adobeconnect.com.
- Find your meeting.
- Click on Recordings.
- Locate the recording.
- Make the recording publicly accessible by selecting the recording and then clicking 'Access Type'. Then click 'Public' and 'Send'.
- Download the recording or share it directly with the URL.
chat
When you create a chat-pod it is automatically set up to chat with everyone.
To send a private chat, hover over or click on the name of the participant you wish to chat with and choose ' Start Private Chat'.
- When in the meeting room, go to the "Meeting" menu.
- Return
How To Create A Meeting Room In Adobe Connect
Source: https://fabo.org/dca/Adobe_Connect_Quick_Guide_for_Meeting_Hosts
Posted by: ranasion1950.blogspot.com
0 Response to "How To Create A Meeting Room In Adobe Connect"
Post a Comment